Deutsch
Batteries
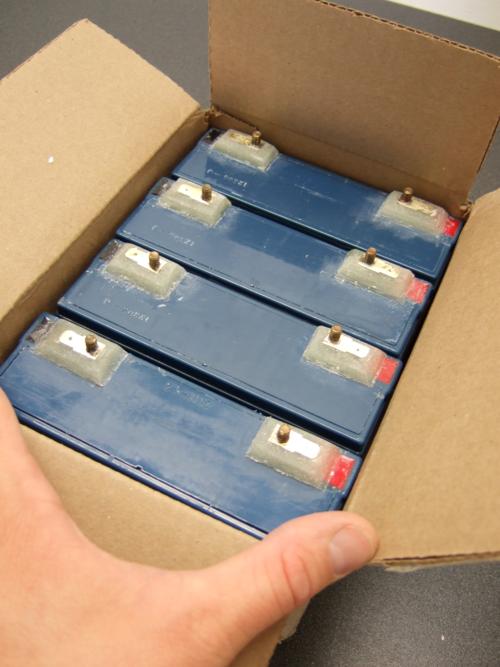
One of the first things I did after I bought the DG400 was to check the condition of the batteries. As expected they were not the best anymore and could only hold 60 % of their specified charge.
 cleaning the connectors
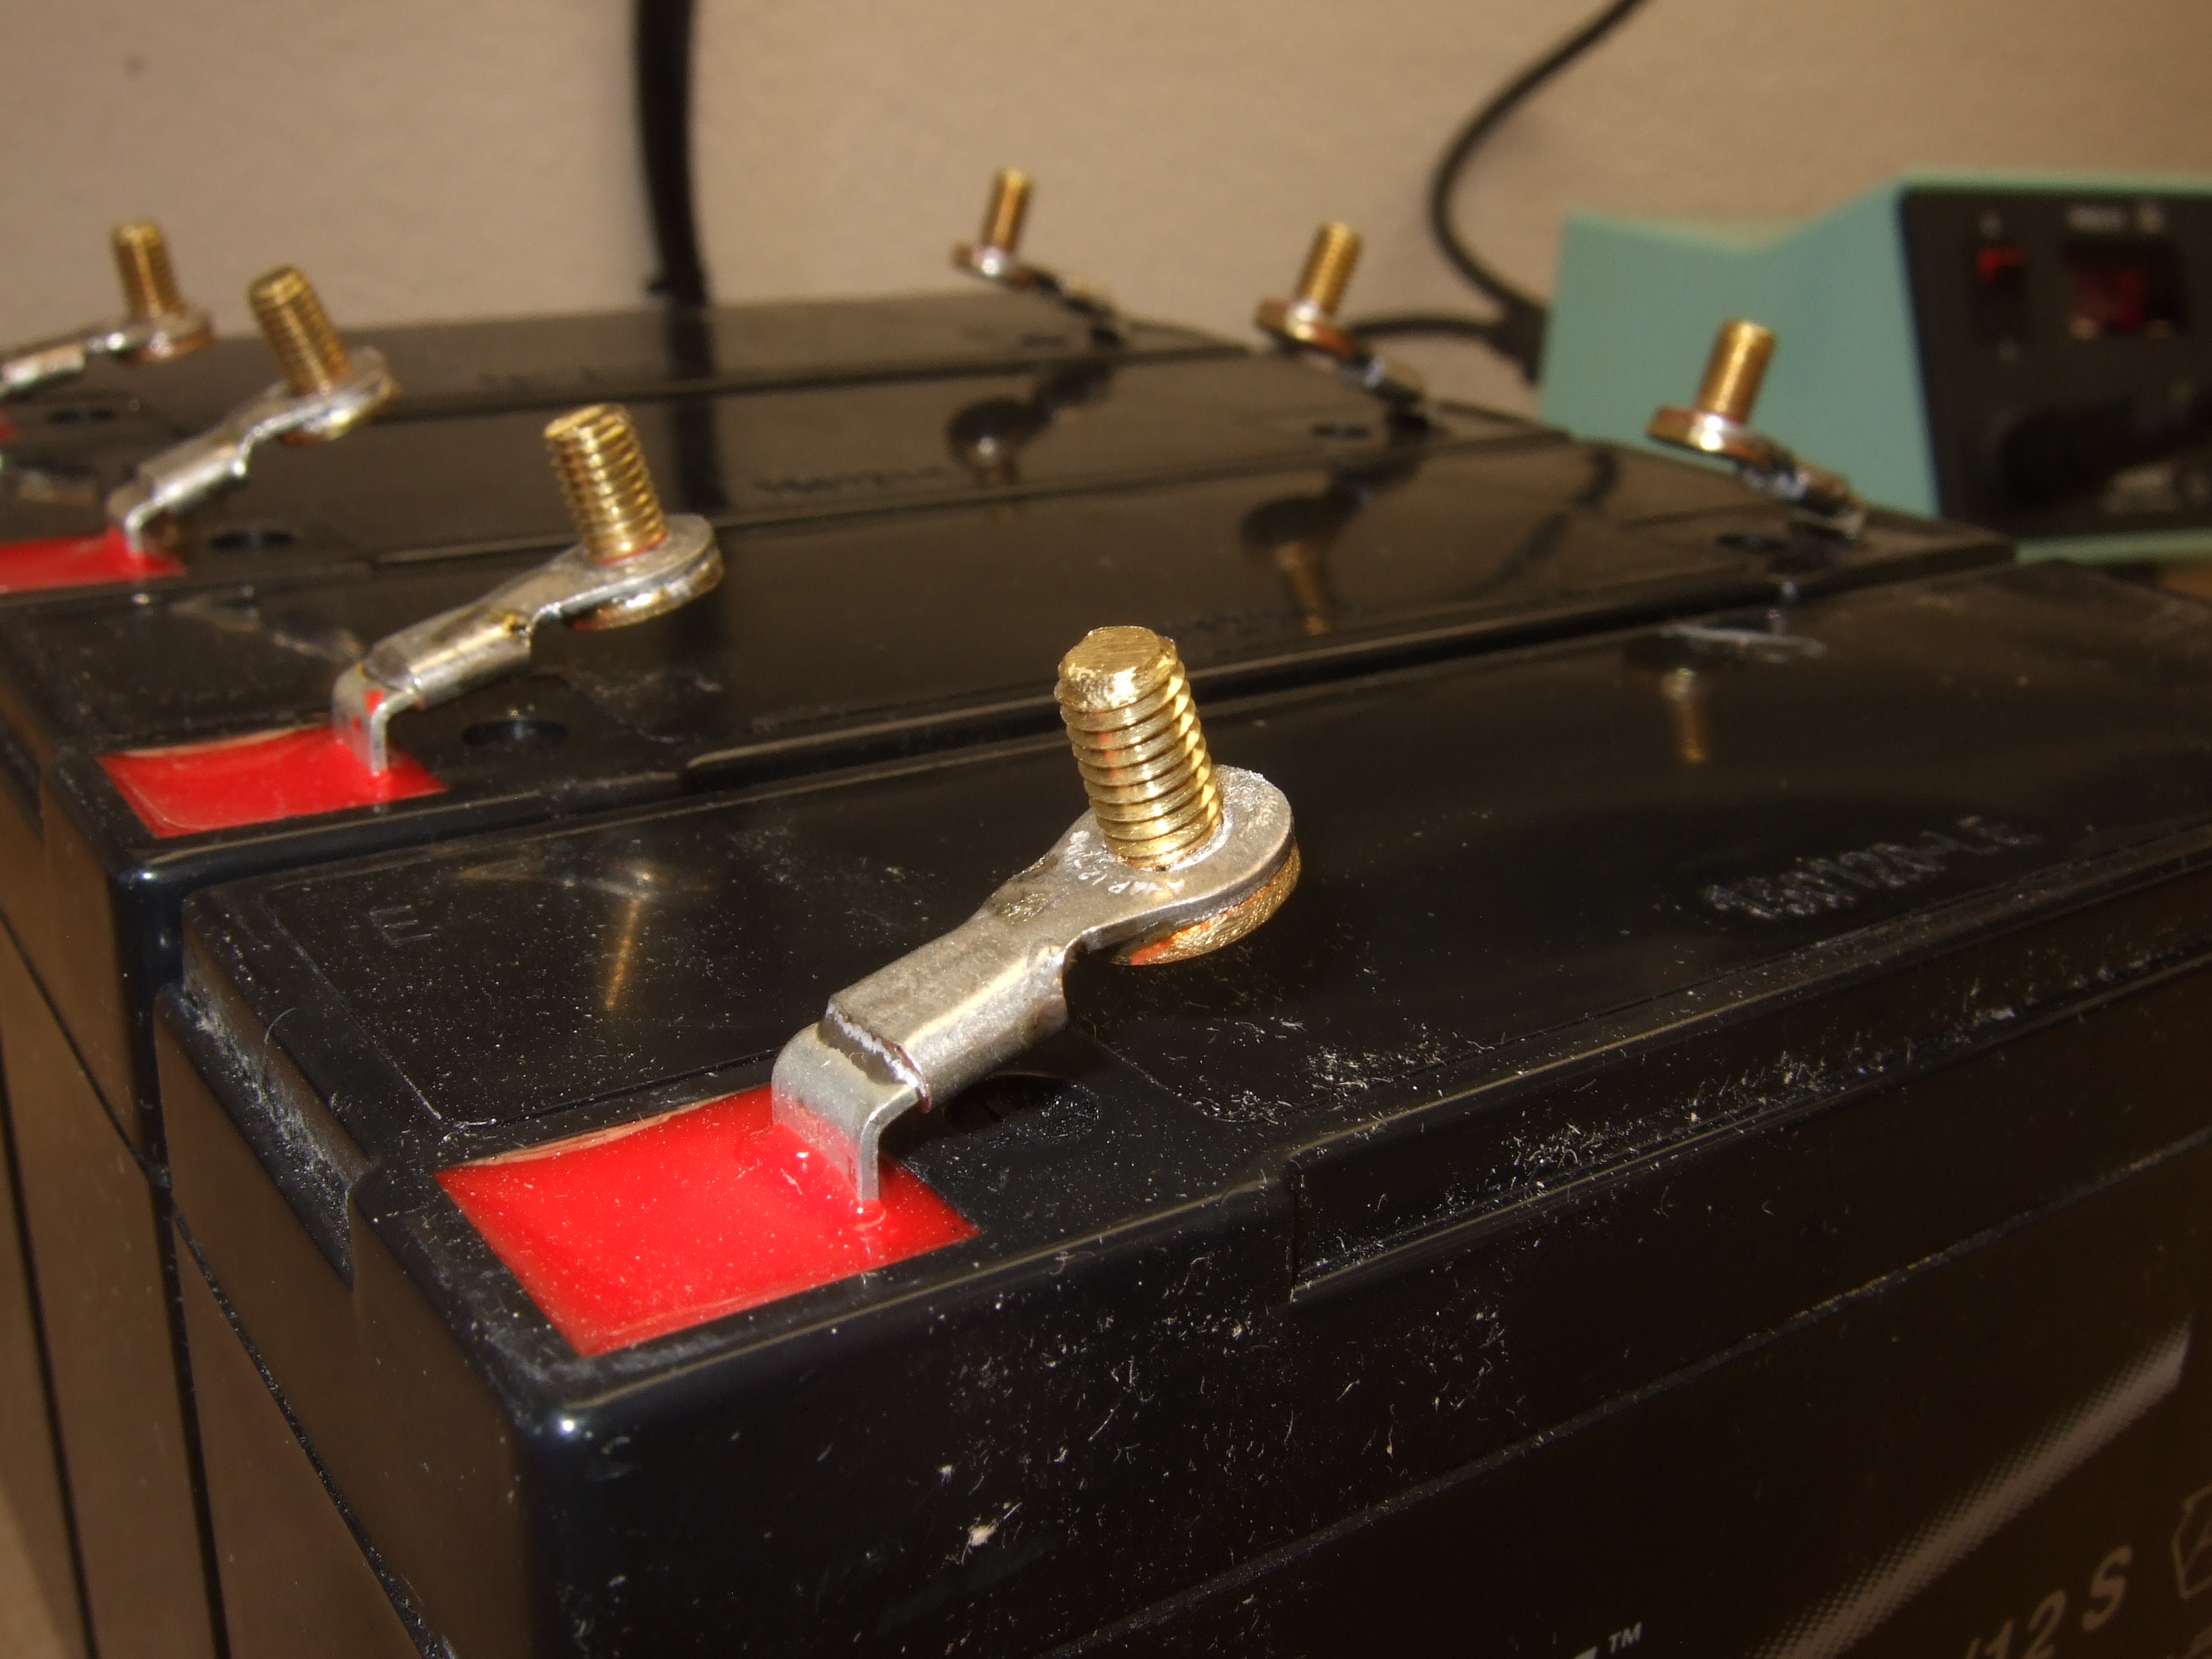
I was a little bit shocked that only a single side soldered connection is used. But the last decades have shown that this connection seems to be reliable enough.
soldered contact 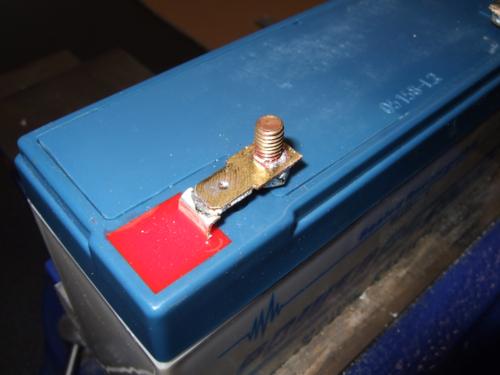
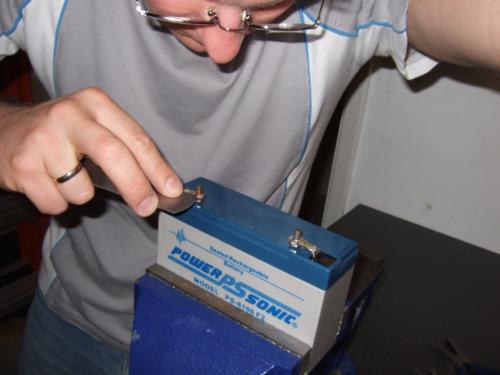
So I ordered four new Power Sonic batteries (see maintenance manual for approved types). For the soldering I made sure that the solder surfaces were absolutely clean. I did apply solder to the brass contact first. With this hot brass contact in a pliers I applied solder to the brass of the battery contact (hot and fast). This way I got a reliable connection without thermally punishing the battery to much.
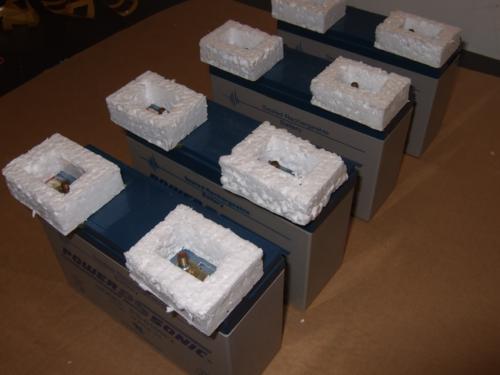 Foam molds
The contacts are getting their mechanical strength after they are surrounded by resin. I belief that DG is using a nice silicon mold. In the beginning but I simply shaped some foam to molds and glued them with carpet tape to the batteries. Today I'm using 3D printed frames as shown at the bottom of the website.
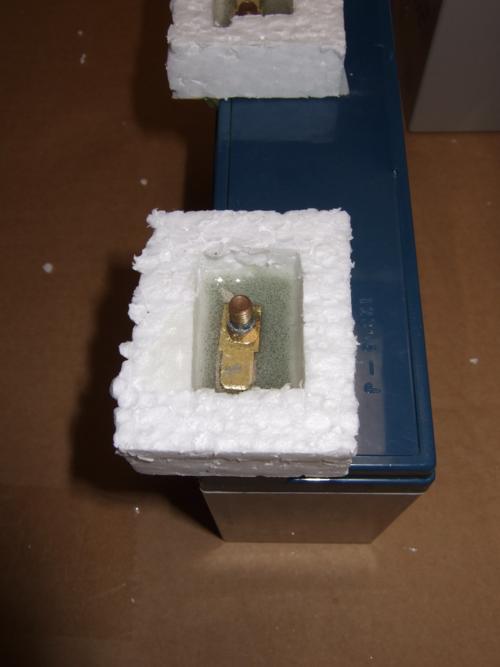
Ready for the resin 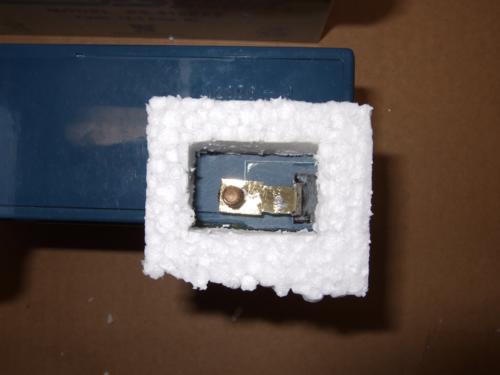
The tape should seal the mold against the battery! I filled the mold with resin up until the contacts. Not making a mess helps to prevent unnecessary work ;-)
 resin filled
After curing, I removed the molds simply by destroying them. Vacuuming helps to prevent having foam balls all over the workshop for weeks ;-)
removed molds 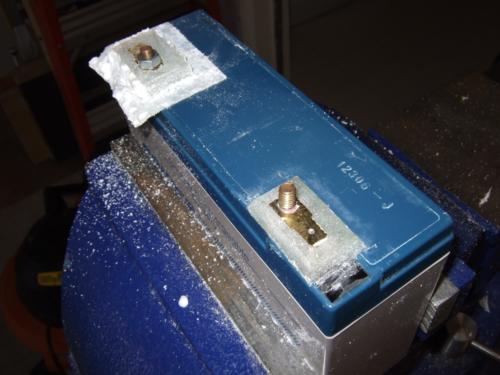
The resin blocks now have to be grinded in shape. Using a good file and an industrial vacuum cleaner, this work isn't this hard. Make sure you are not electrically short cutting the battery with the file!
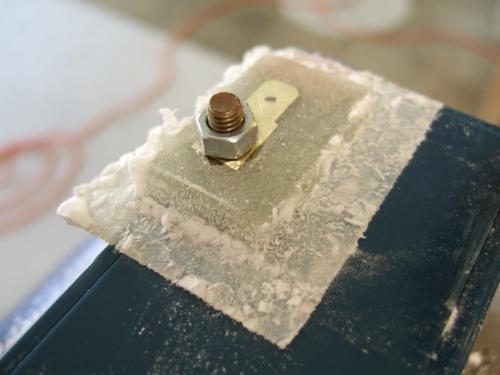 grinded to shape
cleaned contact 
What is a little bit bothering: You have to do this 8 times! Don't complain - just do it:
 8x the whole thing!
Finally the positive contact needs to be painted red and the negative blue. This is actually fun work :-)
red & blue 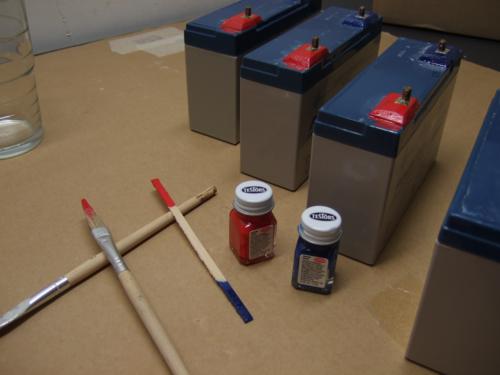
After the paint is dry the batteries are ready for getting installed.
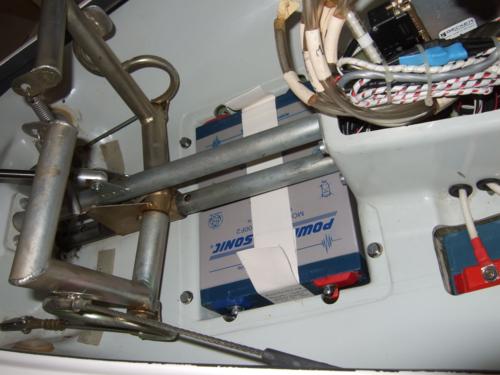 back in service
Before putting them into the glider, install a tape for handling! This will help to get them in and out. I marked each battery with the date and the capacity test result. Use only new self-locking nuts for installation!
Now the DG400 "MR" got it's full battery capacity.
Update
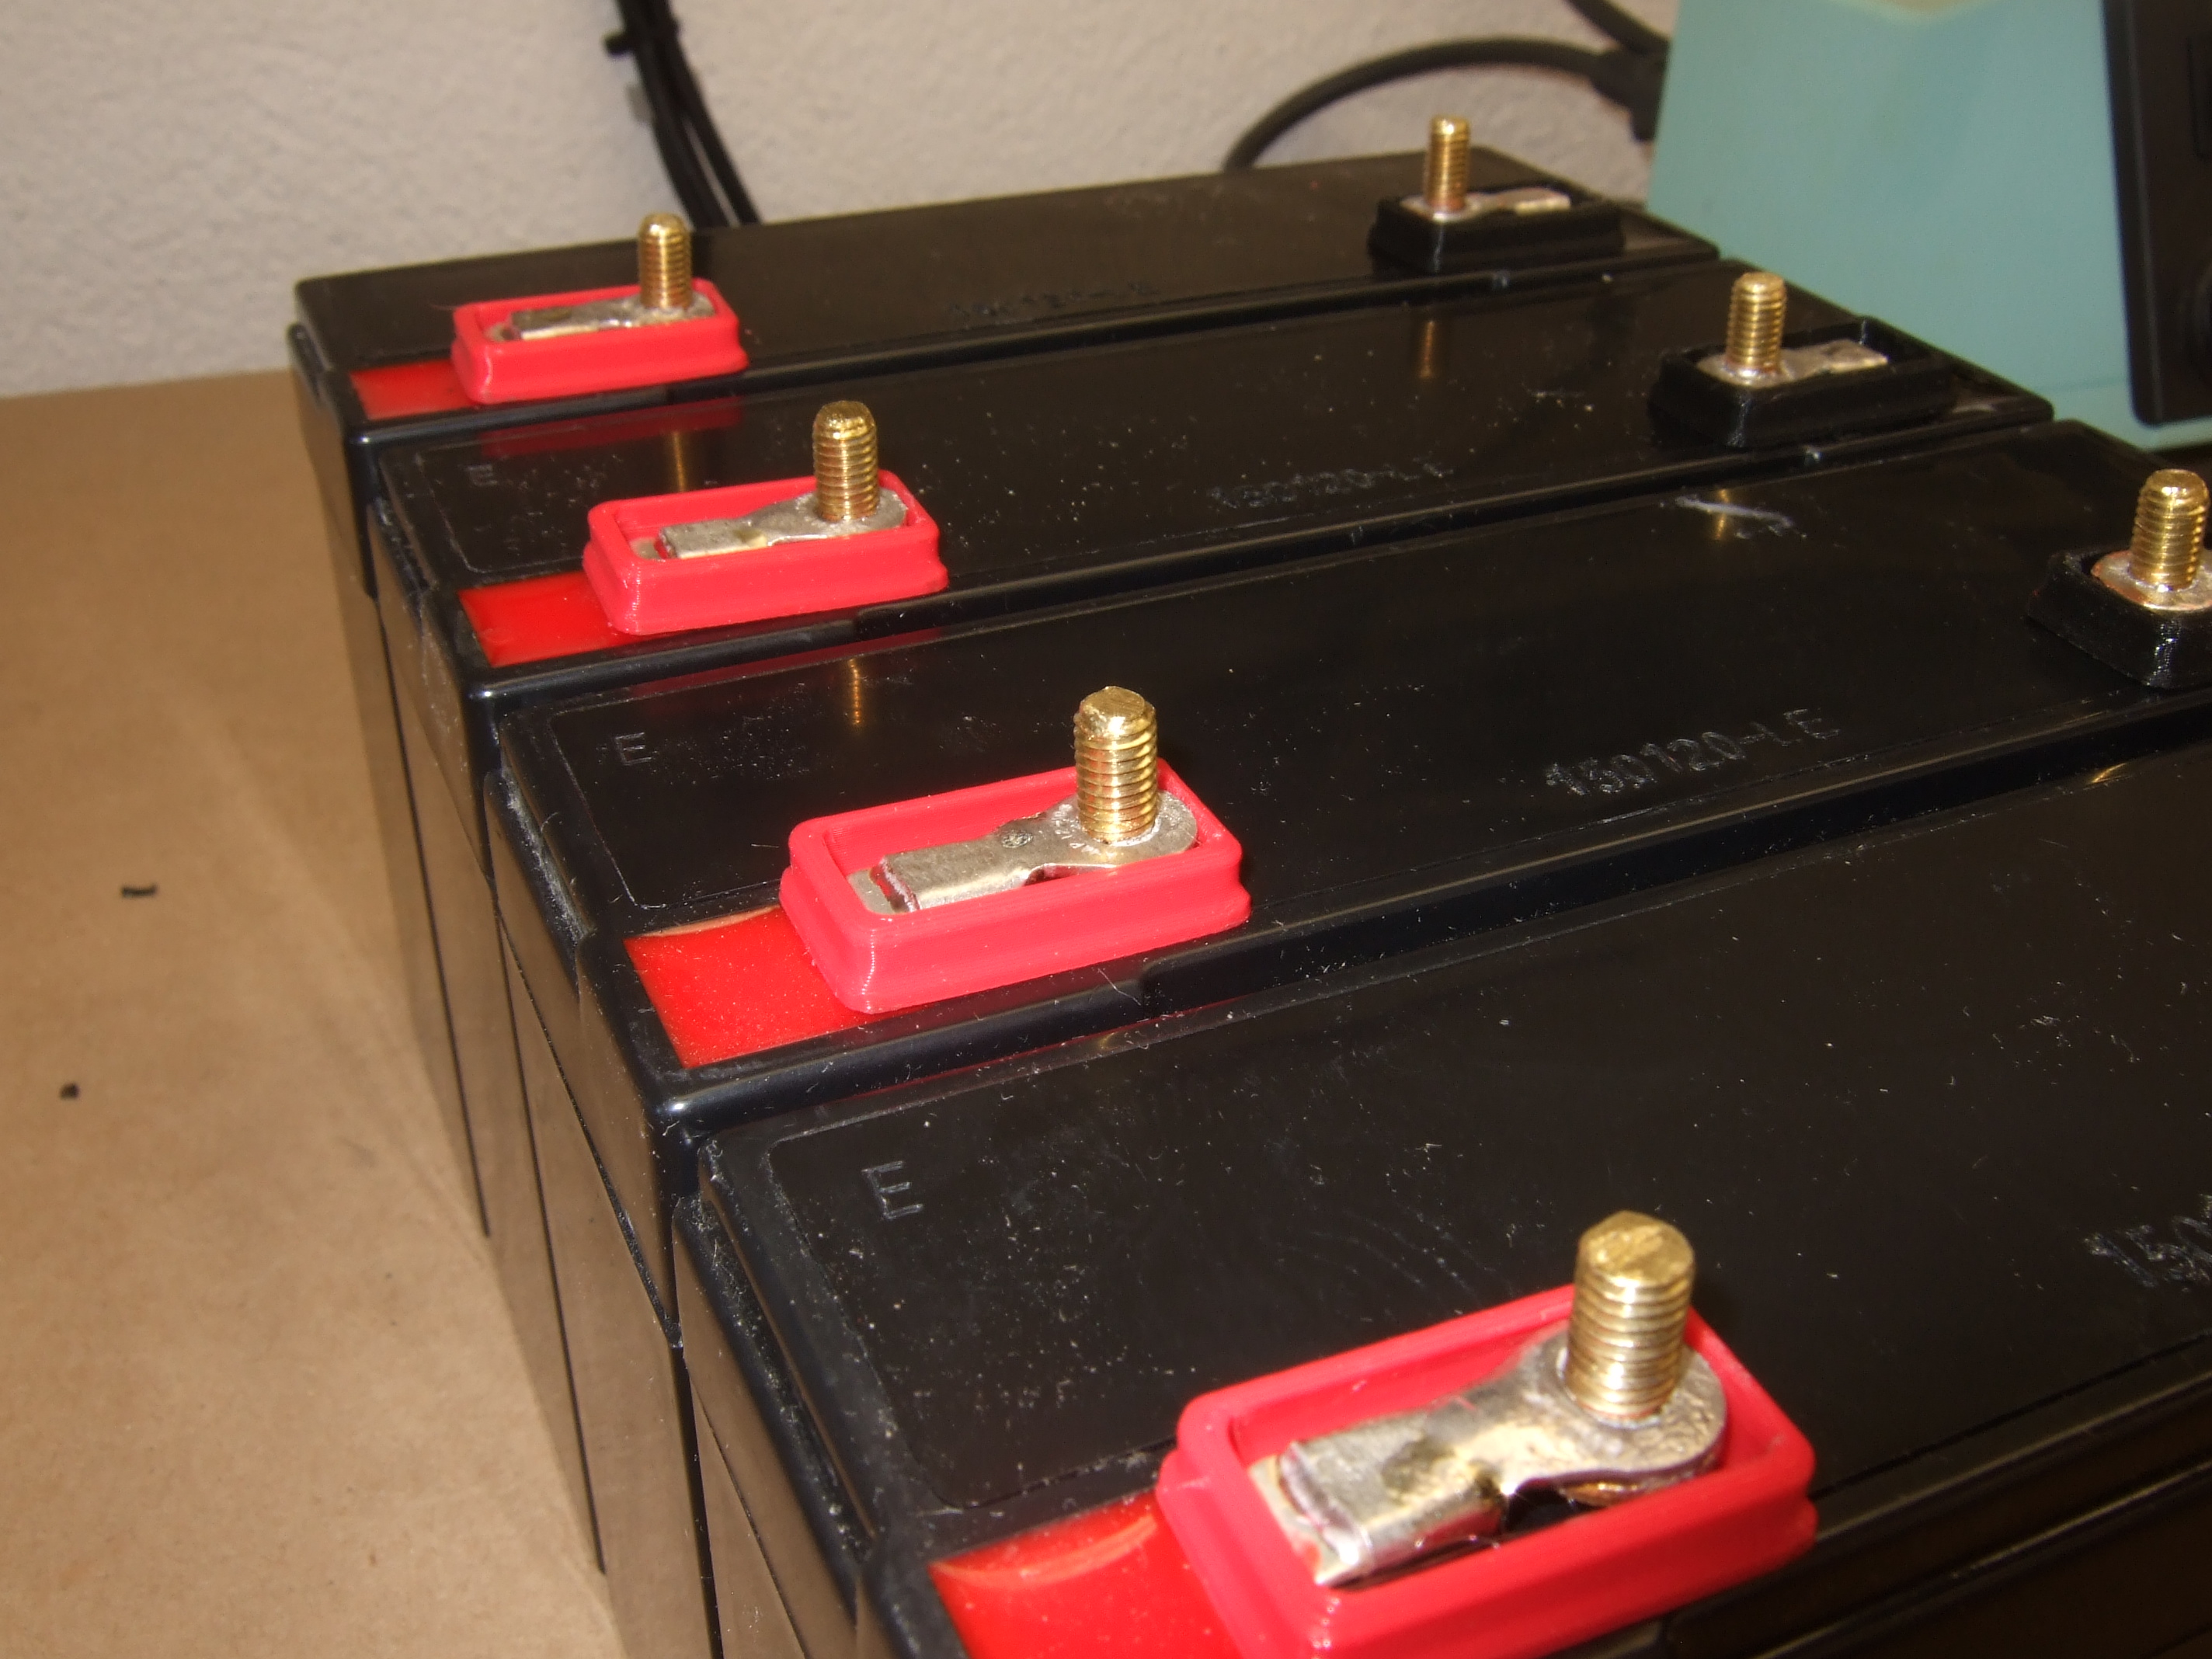
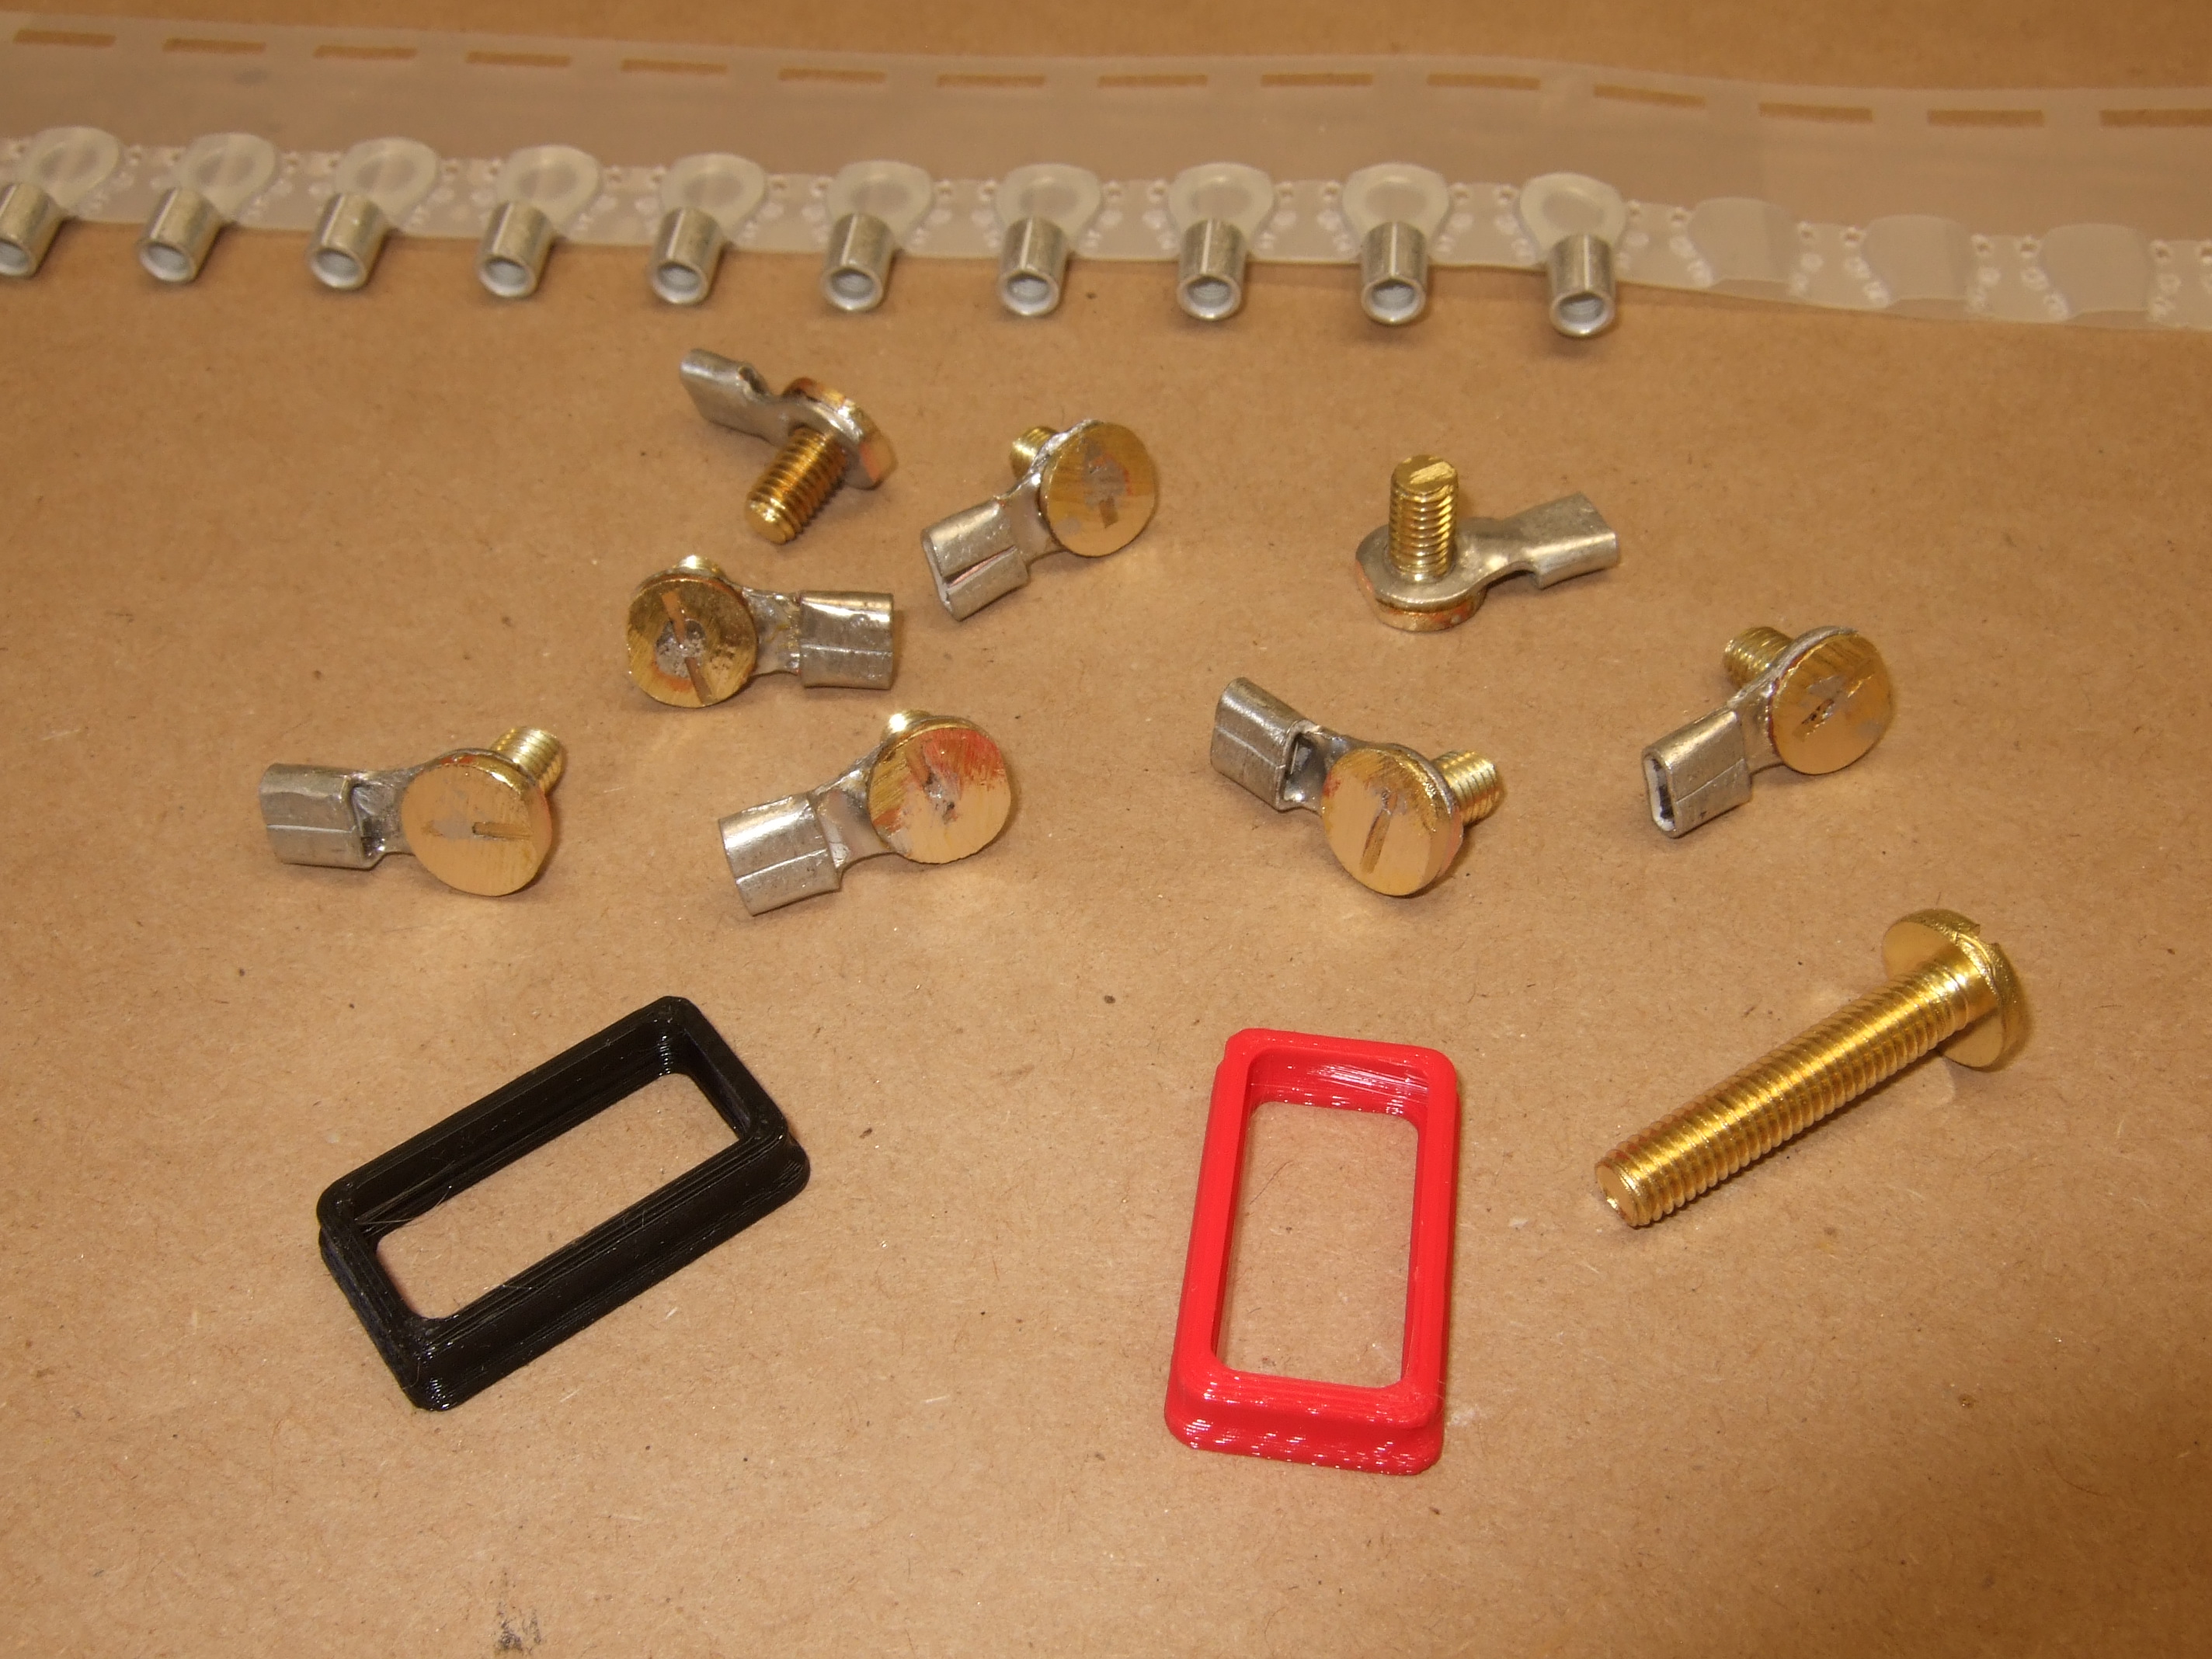
I did build a bunch of batteries since I wrote this page. Today I'm using "Ringkabelschuhe" (M5, 10 AWG, RS order # 795-6317) and 3D printed frames instead of the foam
molds.
Once squeezed flat the Ringkabelschuhe fits perfectly on the 4.8 mm battery connectors (the small ones(!), not the 6.3 mm).
Before soldering the brass screws, I did flatten
their heats in order to reduce their thermal mass (makes soldering
easier). I prefer hot and fast soldering. You have tohave some soldering
experience for this.
The small frames are 3D printed. I glue them with some resin to the batteries, so that their bottom is sealed. Afterwards I fill the frames with cotton enriched resin and grind the whole thing to shape. This method is much less work than the foam molds.
I bought the batteries at Accu-24.de
. This company also makes the batteries for DG and is offering them on
their website for the DG400 and DG800 at a fair price. I had a delivery
problem which was solved within 24 hours and even the owner himself
called me to rectify the issue. For this ***** (5 stars)! In 2015 a
raw battery did cost 20€ and battery with DG400/800 terminals 45€. This
reasonable price races the question whether it's still worth to do the
terminals yourself.
Impressum, Disclaimer & Datenschutz
![]()
 soldered